
Giving your bathroom a makeover can be an exciting venture, adding to its charm, comfort, and value. But the process is a long one with months of planning, scheduling, and permit approvals. For those considering renovating their dated or uncomfortable bathrooms, Silicon Valley Remodeling has created this article, highlighting the entire process in detail. So sit back, relax, and read on to learn exactly how bathroom renovations take place.
Behind The Scenes Of A Bathroom Renovation
You know all those pictures of luxury bathrooms you see in magazines, social media posts, and on TV? There’s a lot that goes into achieving those pristine and sparkling finishes.

Continue reading to learn how bathroom makeovers are done step-by-step.
- Phase 1: Choose a Layout and Style
First, consider what exactly your vision is for your new bathroom. Are you going for accessibility features to make life easier as you age? Or is it an updated style and efficiency you’re after with this bathroom renovation? Picking a style, purpose, and color scheme is the first part of any renovation project, and depending on what exactly you’re looking for, it can take weeks, especially if you’re working with an interior designer.
- Phase 2: Budgeting and DIYing
Next, take a look at your bank and determine how much you’re willing to spend on this little project. Remember, this can be a bit hefty, depending on the look you’re going for. If you’re planning on custom-ordering a few products or you’re going for premium materials, the price tag is going to be a big one.
That’s not even to mention the labor cost. If you have a bit of experience with DIY projects, this is a good time to factor in your skills and experience, as it will impact how much you’ll need.
- Phase 3: Planning, Permits & Measurements
Next step, grab your measuring tape. Remember, everything needs to be precise to ensure you have the right size and quantity of mirrors, tiles, and the rest. While you’re doing that, also consider whether you need to acquire permits from the local authorities. If you’re having electrical and plumbing work done, this is crucial.
- Phase 4: Placing Orders
If your project meets building regulations, it’s time to place your orders. Carefully order the materials, fixtures, and fittings for your new bathroom, ensuring you select waterproof materials that won’t get damaged in the bathroom.
Also, make sure that if you’re having something like your shower or tub enclosure custom-made that you keep in mind that they will take longer to arrive.
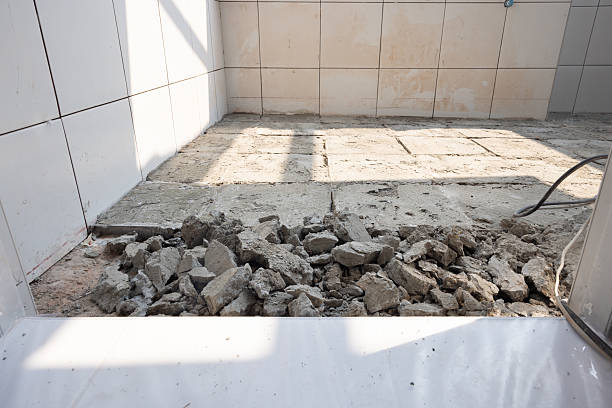
- Phase 5: The Demolition Process
Now your bathroom renovations can officially start. Your renovation contractors will remove all the old floors and fixtures, and this might take a day or two, depending on your unique project.
Remember that during this phase, there will be a lot of dust and debris flying about the house, and so you’ll need to cover furniture and floors with plastic sheets to prevent damage.
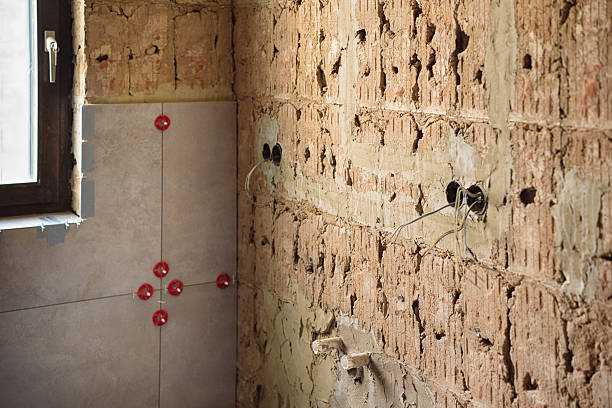
- Phase 6: Laying Down The Foundations
Finally, the construction phase can begin. The renovation contractors will lay down the tiles on the walls and floors first, carefully cutting tiles that go around fixtures like bathroom sinks and the toilet. This is a slow process that has multiple steps and can take a few days to complete, so patience is advised.
- Phase 7: Fixtures & Fittings
Now that that’s done, it’s time to set up the new toilets, vanities, and sinks. This is truly when the new bathroom starts to take form, and the weeks of discomfort and wait seem worth it.
Ensure that each part of your new bathroom is set up perfectly, at the correct height (in case of a mirror and floating vanity), and that the tiles are dry and firmly in place before this phase starts.
- Phase 8: Finishing Up The Walls
Now, it’s time to pick up a paintbrush. You can choose to DIY this step if you have the skills and patience, but if not, your bathroom renovation contractors have you covered.
Adding primer and then the paint, they will seal it all with a waterproof coat to ensure your new paint scheme lasts the test of time and moisture damage.
- Phase 9: Time To Accessorize
It’s almost ready. Now all that’s left is to install your new shower curtains, add towel racks, the medicine cabinet, and fill up your vanity with all your products. Restock your bathroom and prepare to enjoy the comforts that a newly renovated bathroom brings to your life.
Conclusion
Bathroom renovations can span weeks to months, but the result is usually worth it. From the initial planning to ordering the materials to setting down that shampoo bottle at the end, it’s a transformation that is both exciting, time-consuming, but well worth it.
FAQs
How much do bathroom renovations cost on average?
Depending on the scope of your project and the materials required, the cost can be anywhere between $6626 and $17521.
How do you choose the right tile for a shower?
Take into consideration the slip-resistance, the grout, as well as the water-resistance features, along with the color of the tiles.
What adds the most value to a bathroom?
Things like walk-in showers, upgraded storage, and a well-planned lighting scheme add the most value to any bathroom.
Can I DIY parts of a bathroom remodel?
Yes, tasks like painting or installing accessories can be DIYed, but plumbing, electrical, and tile work are best left to professionals.
How long does a bathroom renovation take?
A typical bathroom renovation can take anywhere from 3 to 6 weeks, depending on design complexity, materials, and contractor availability.